- Features by Edition
- Latest Features
- Licensing/Activation
- Installation
- Getting Started
- Data Sources
- Deployment/Publishing
- Server Topics
- Integration Topics
- Scaling/Performance
- Reference
- Guide to Views
- Keyboard Shortcuts
- Dates & Times
- Manage Fields
- Tokenised Data
- Using Formulae
- Scripting
- Mapping & GIS
- Advertising Options
- Legacy User Guide
- Translation Guide
- Specifications
- Video Tutorials and Reference
- Featured Videos
- Demos and screenshots
- Online Error Report
- Support
- Legal-Small Print
- Why Omniscope?
|
|
|
|||||
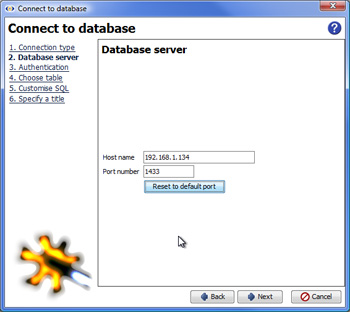
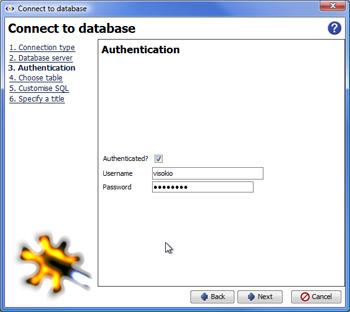
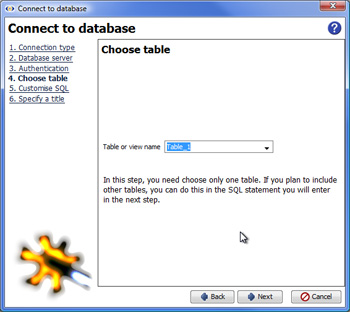
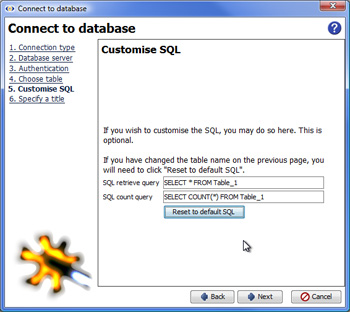
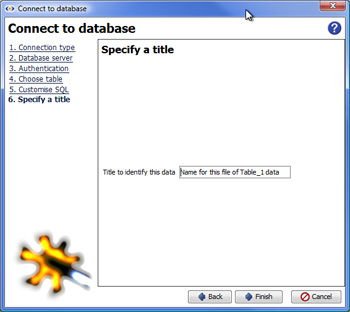
Database Wizard 2.5File > Connect to Database...Using the Database Connection wizardConnecting to relational databases using SQL and ODBC or JDBCOmniscope can connect to and import data from any relational database that supports common protocols like ODBC and JDBC. The Database Connection wizard guides you through the process of connecting and importing your data, and saving it as a new Omniscope file. Your file will remember its source(s), and on refresh re-execute the embedded SQL statement to re-generate the reporting view/table and repeat any subsequent merges with other files either on opening, or on demand. The Omniscope Database Connection wizard lets you define a connection and pass any standard SQL expression that results in a single 'flat' table. If you do not have authorisation to execute SQL statements, or don't know the SQL required to generate the table you want, your Database Administrator may have to create the connection in the wizard and/or create the appropriate reporting view(s). Some organisations also have additional high-performance analytical and reporting databases that pre-prepare data for reports by performing joins, aggregations, sorts and scans on data assembled from multiple transactional databases. In general, Omniscope interacts with 'business intelligence' analytical databases in exactly the same way as transactional database views/tables. For more technical information, see the Database Connections section of the KnowledgeBase. Using the Database Connection WizardClicking on File > Connect to database launches the Database Connection wizard. The wizard guides you through a six-step process for defining a linked data source from a relational database view/table. You will need to know the type of database and its connection details. Using the Database Connection wizard, you enter the connection details for your database and choose which database table or reporting view you wish to retrieve data from. By default, this will create a persistent linked data source relationship between this database table/view and the Omniscope file.
|