|
|
|
|||||
Image SetsOmniscope Image CataloguesAdd pictures to your filesImage sets are folders of image files that can be associated with a data set and embedded in Omniscope files at various sizes. Image sets associated with Omniscope files can be:
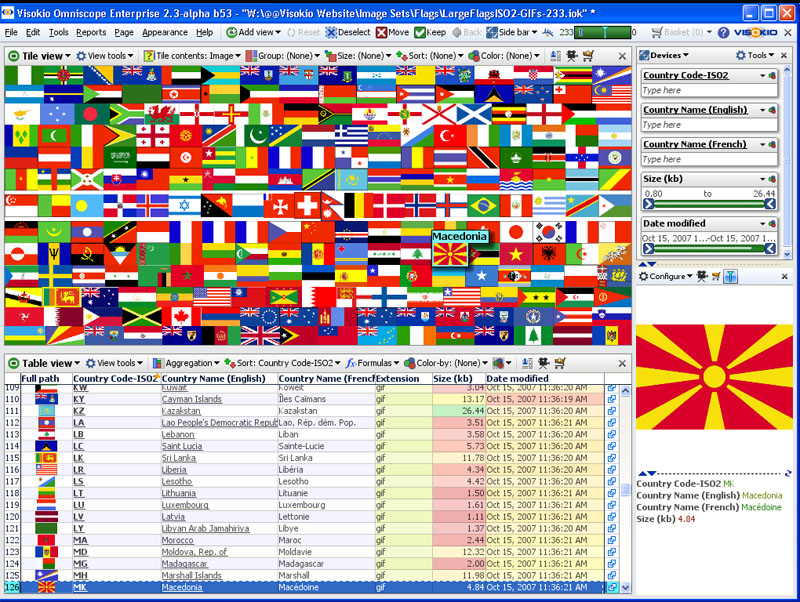
Note: DataPlayers only embed thumbnails of associated images in Tile and Table views. You must maintain separate folders of larger images on a web server to display larger, higher-resolution images in the DataPlayer Details windows. General-purpose Image Sets (free)Below are a selection of free, general-purpose image sets with image file names matching various international standards, such as ISO codes for countries, etc. These image sets are available both as Omniscope image catalogues and zipped folders. Try downloading both the Omniscope image catalogue and the zipped folder to compare the two methods of delivering image sets. The Omniscope image catalogues can be used by anyone with the free Viewer or better and include full instructions on exporting the images you wish to use to a new folder. Download and export (or unzip) the the image folder(s) below on your desktop (if you are adding them to an embedded demo) or save them in a sub-folder underneath the folder holding the .IOK/.IOM file with which you plan to associate the images. Once you have saved the folder of images, use the Add Images wizard (see tutorial below) to associate the images with your own data sets. Flags by countryThese image sets contain .GIF images of the official flags of all countries in the world, named according to standard ISO-Alpha2 codes. If you have country names or ISO2 codes in your data sets, you can add flags from these image sets into your own data files quickly and easily (click on image to see larger screenshot).
Image sets for embedded demosOmniscope installs with a series of embedded demonstration files accessible from Files > Demo files. To avoid increasing the size of the installer files, the high-resolution image sets/folders associated with some of these demo files can be downloaded separately from the links below. These image sets are available both as Omniscope image catalogue files, and as zipped folders. If you download, save and export (Omniscope .IOK catalogue) or unzip (zipped folders) these image sets to a local folder, you can try the demos with these high-resolution images available locally. If you have an activated edition of Omniscope, you can also save and share copies of demo files with these images embedded at any size you choose (see tutorial below). Note: Some of these folders contain a large number of high-resolution images, making them quite large. Omniscope embedded demo images:Below we provide image catalogues and zipped folders containing images associated with certain demos embedded in Omniscope
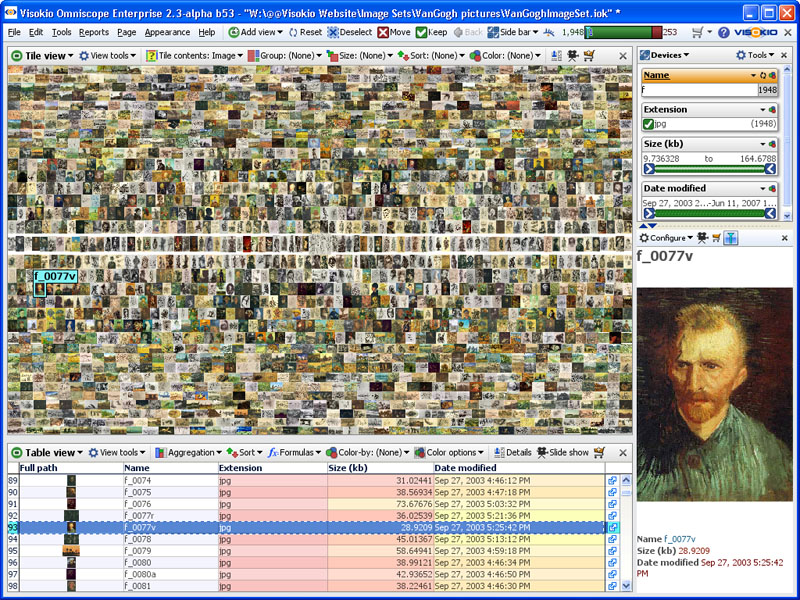
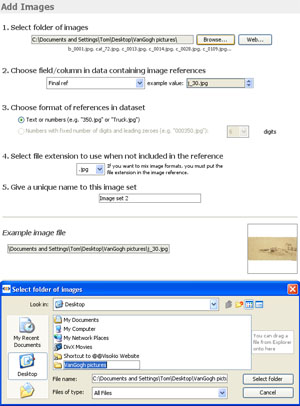
(More image sets will be posted soon) Tutorial: Using the Add Images wizardThis Add Images mini-tutorial provides an opportunity to try adding embeddable image sets back into the demo files and, if you have an activated edition of Omniscope, to experiment with embedding the images at different sizes/resolutions in copies of the demo file you can save and share with others. Once you have saved the unzipped image set on your desktop, Open Omniscope and click on Files > Demo files and select the demo for which you have downloaded the image set, for example, the Works of Van Gogh. Open the demo file. The embedded version of the demo file has no embedded images, it retrieves the images over the web. Go to Settings > Images and you will see there are two options for retrieving the images, the automated, online service, and the manual approach. To gain experience using the Add Images wizard, try adding the downloaded image set on your own,. First, select Add more images. Note: If you also leave the online image set enabled, you will see two copies of each image in the Details View of the finished file, one local and one being served over the web. In practise, they could be different images instead of the same. Selecting Add more images will launch the Add Images Wizard:
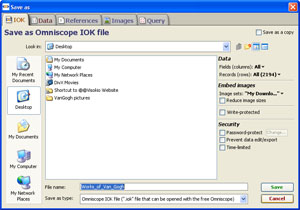
Viewing ImagesTo see your image set displayed, go to Add View on the top Omniscope Toolbar and add a Tile View. On the View Toolbar, click on the [?] field (column) selector drop-down and select My Downloaded Images. You will see the images start to appear, but coloured. Go to the Colour selector to the right on the View Toolbar and select 'None' to see his works coloured as van Gogh intended. Saving/reducing image sets to manage file sizeIf you have an activated Edition of Omniscope (Professional or Enterprise) you can experiment with saving the file with your downloaded images embedded. At the same time, you can see the trade-offs between file size and image clarity/resolution that results when you reduce the image size to reduce the size of the .IOK file. To save a version of your file click File > Save as. The File Save Wizard will appear...note the options available along the right hand side:
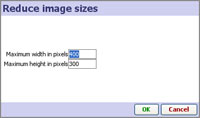
The image reduction dialog appears...enabling you to reduce the size of the images to reduce file size, but at some cost in terms of image clarity.
Open the new file and close all the open Views except the Tile View, which should be set to display the embedded image set 'My Downloaded Images'. On the Tile View Toolbar, select the movie camera Slide show icon to the left of the Add to basket icon far right. Click Start slide show and choose full screen sub-option. Look at the image quality on your screen. If it is acceptable for the audience and screen resolutions you intend, consider reducing the images more to reduce the .IOK file size further. If the image quality full screen is not acceptable, you may have to reduce the image less (increasing the file size), or configure the views such that images are never displayed so large. To do this, you repeat the steps above, setting larger maximums in the Reduce image size box shown above. |